Panda Helper iOS
VIP Version Free Version Jailbroken VersionDownload Tweaks and Hacks from Panda Helper
Minecraft Free Download and Guide for Newbies
Minecraft is a single and multiplayer survival game in an open world. Here you can explore a limitless world, build your own house in your unique way, find villages, and do anything you want to! It’s called Minecraft because you have to dig to gain resources such as wood, stone, coal, iron, and of course, what everybody wants, diamonds. The Minecraft free trial is available on Windows, PlayStation but not iOS. Panda Helper provides Minecraft free download on iPhone, iPad, and Android for everyone. Otherwise, the game is available on the App Store for $6.99.
The ultimate goal is to beat the Ender dragon, yet this feels like a suggestion when you play Minecraft free on Panda Helper. Today we will go over what you need to know before you hit that build world button and how to play Minecraft on the first day and night. In the meantime, we’ll show you how to download Minecraft free on phones.
- Day One in Minecraft Free
- The First Night in Minecraft Free
- Underground Mining in Minecraft Free
- Minecraft Farm
- Minecraft House Tutorial – Minecraft Builds
- How to Build a House in Minecraft Free
- Overworld in Minecraft Free
- How to Get Minecraft Download for Free?
- Minecraft Redstone Guide for Beginners
- Minecraft Potions Guide: Complete List
- Minecraft Commands List
- Enchantments Guide
- Crafting Guide Recipes
Day One in Minecraft Free
Resources
Resources are one of the main components of the game. Hundreds of different resources do other things in the game, but for day one, you will only need a few essential resources.
How to play Minecraft on day one? Your first goal is to make a bed. You will need to find a tree and break 3 logs from it using your hands. These three logs will be enough to make a wooden axe. Once you have created the wooden axe, you can hack at a tree and gather more wood much faster. You should gather at least 32 logs to make all the necessary tools, such as swords, pickaxes, axes, and spades.
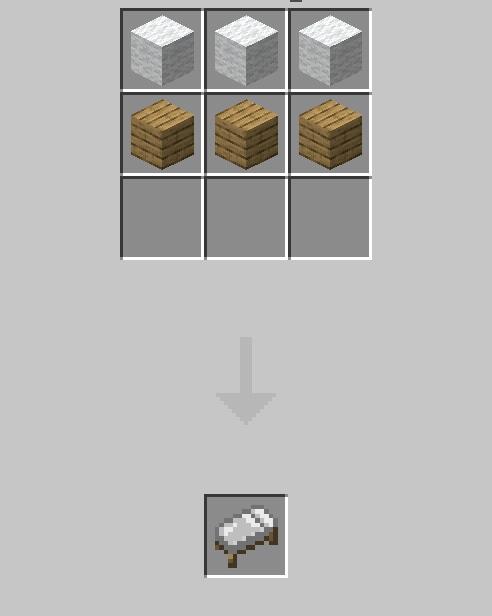
If you are lucky enough, you will find sheep, and you can gather 3 wool and wood. With this, you can use your crafting table and make a bed.
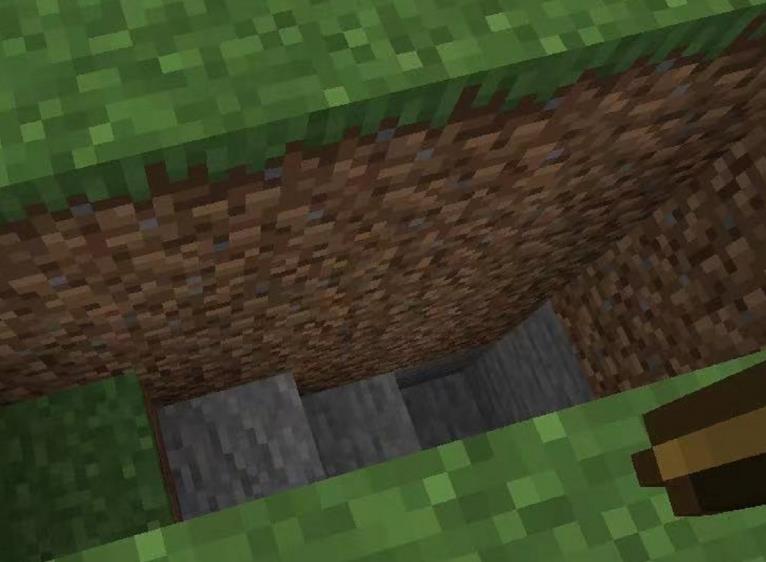
Your next step would be to gather some cobblestone. As previously with your logs, you will need to collect about 32 cobblestone blocks to create the tools again, as they will be stronger. Cobblestone is usually found about 3 to 5 squares below ground. These resources should get you through the first day or two.
Foods
The player will have a health bar on the top left of the screen and a food bar on the top right side of the screen when play Minecraft. The health bar will only increase if the food bar is full. The food bar will drop over time and more rapidly when the health bar is not full.
After mining the cobblestone, your food bar will have already dropped, so it is time to kill some animals for meat. There will be options such as sheep, cows, pigs, and chickens that you can kill for meat. Each animal will have their meat, and each meat will increase your food bar by different amounts.
- The food bar has 10 Hunger Points.
- Raw Beef and Raw Pork = 2 Hunger Points.
- Cooked Beef and Cooked Pork = 4 Hunger Points
- Raw Chicken = 1 Hunger Point
- Cooked Chicken = 3 Hunger Points
When you have cooked the foods, they provide more Hunger points that increase your food bar. Therefore, it is always better to cook your meats. Beef and Pork provide the most Hunger Points, so you should prioritize them.
First Home
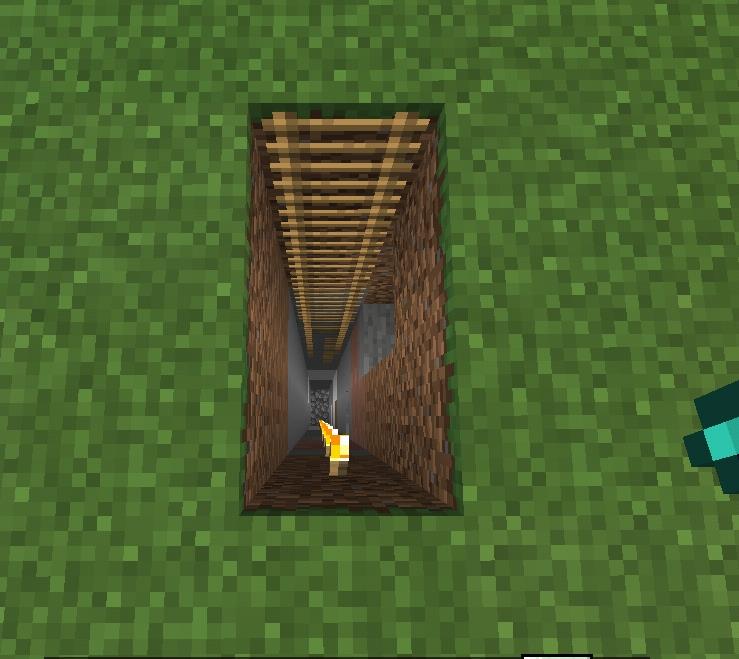
On day one, as the night begins, you will want to have a place to hide before the mobs start to spawn around you and attack you. The most straightforward way to hide from the spawns is to hide underground.
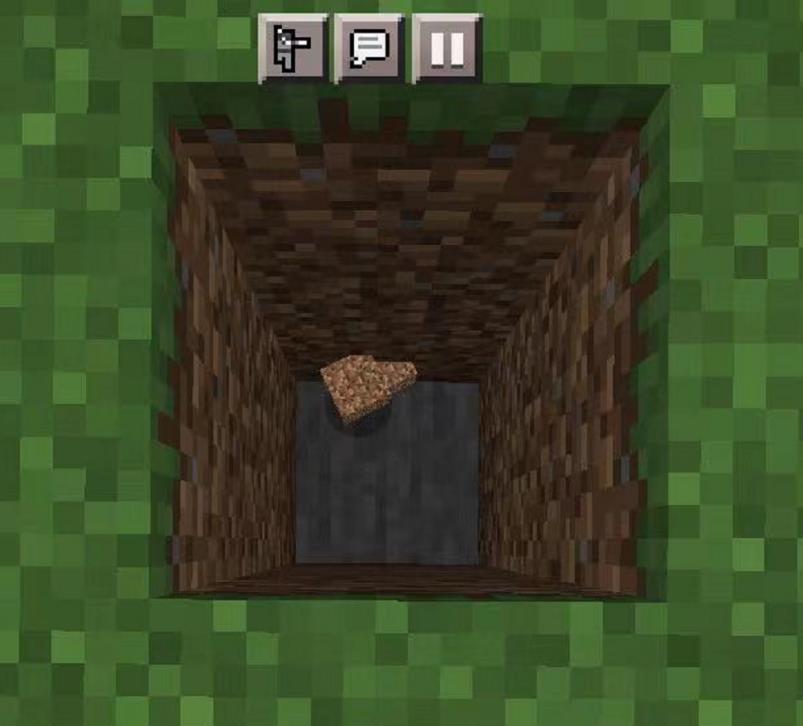
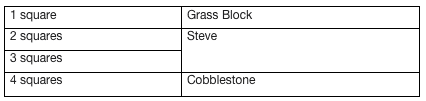
You can dig 4 blocks downward, climb into the hole and add a block above your head.
Suppose you were lucky enough to find sheep and gather 3 wool, making a bed, laying it down, and sleeping on it as nightfall begins. You can sleep through the night and avoid the mobs from spawning around you.
Dig a bit of a giant hole that your bed can fit in, close the hole up and tap on the bed. If the time is right, you will lie in bed and wake up as the sun returns.
The First Night in Minecraft Free
Explore instead if you do not want to sleep through the first night. You will run into a couple of friends who want to hurt you, So you must be careful. How to play Minecraft on the first night? Here are some mobs that may show up.
Baby Zombie and Zombie
If you see these friends walking toward you, what should you do? Answer: Run quickly. A Zombie will burn in the sunshine. They spawn during the night or in darker areas such as caves.
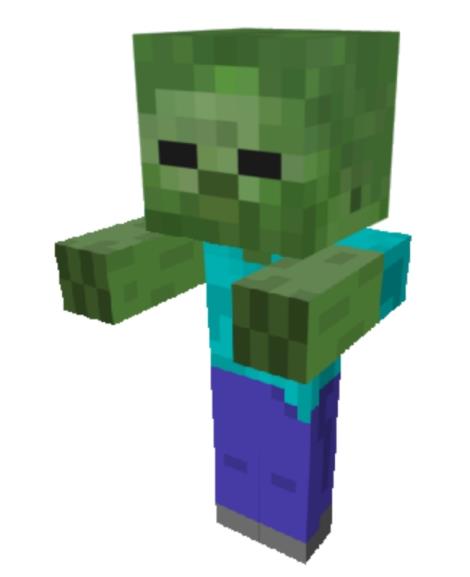
Baby Zombies are rarer and have a 5% chance of spawning. Their area is short, measuring 0.95 squares tall and only 0.3 square wide. They sadly do not grow up and remain a baby forever.
Because they are so short, they can run through an area where 1 block is missing. They are much faster than other mobs and will take as many health points per hit as a standard full-sized Zombie.
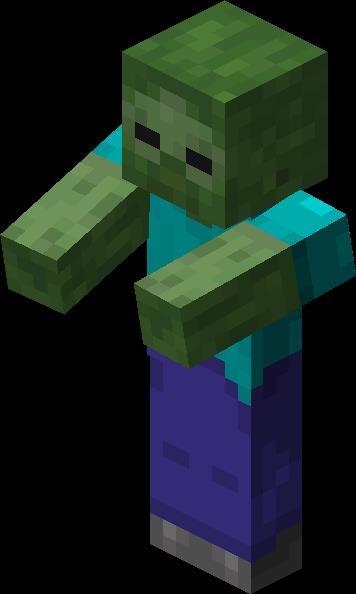
Zombies can drop these items when killed: Rotten Flesh, Potatoes, Carrots, Iron Ingots, and Armor.
Skeleton
Just like the Zombies, if you see a Skeleton, dash.
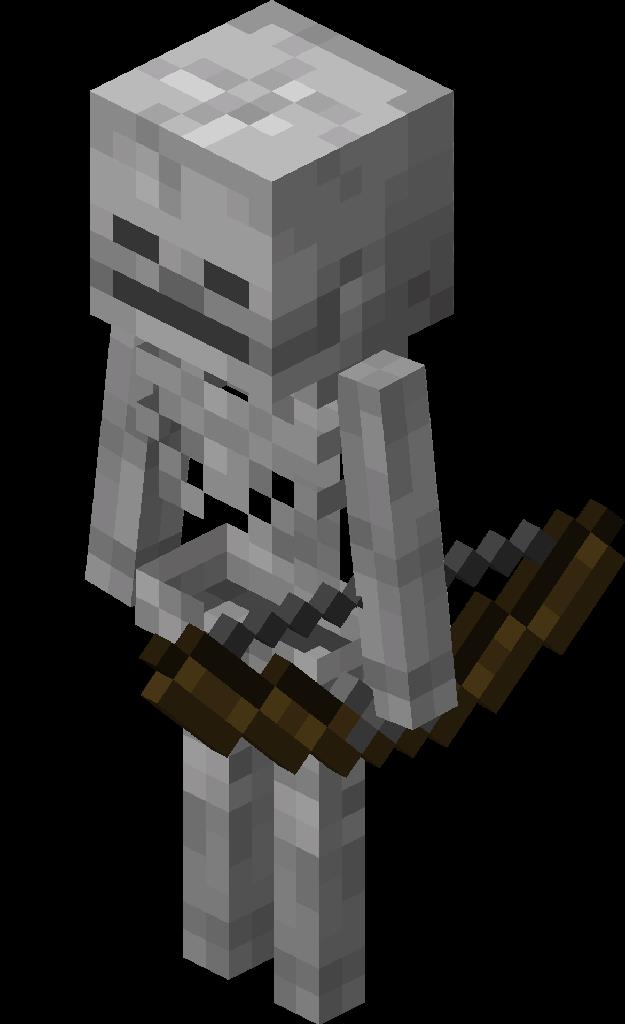
A Skeleton will burn in the sunshine unless they are standing in water. They spawn during the night or in darker areas such as caves.
A Skeleton will shoot arrows at you, and when to hit, you will take some damage and bounce backward. They are pretty easy to handle, though. They will not aim well if you constantly move to the left and the right. This will make it easier to attack back and kill them.
When a Skeleton is killed, it will burst into a cloud of white smoke and can drop the following: Bones, Bows, and Arrows.
Creeper
The infamous Creeper, unlike other mobs, can roam in daylight. The Creeper is silent as it roams around, and when it reaches you, it will explode. This will knock you back a few blocks and take a chunk of your health away.
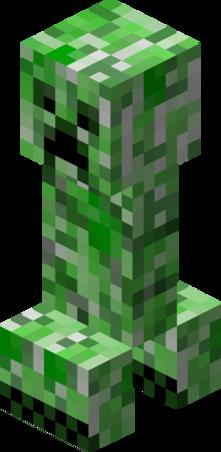
The Creeper will only go after you if you come close to it. Once the creeper reaches you, you will hear a fizzle as it charges up to explode. This will take about 1.5 seconds. The explosion parameter is 3 blocks. If you are further than that, you will take no damage.
To kill a Creeper, go close enough to hit it, then move back further than 3 blocks, the Creeper will stop fizzling, and it won’t explode. Repeat this until the Creeper dies.
If you kill the Creeper dies, it can drop the following: Gunpowder, Records. The Creeper is afraid of Cats.
Cave Spider
The Spider is not always violent. While the Spider is in daylight, it will not attack you unless you attack it. It is only at night or in caves the spider will attack you. The spider has a unique ability to climb up walls and into single blocks.
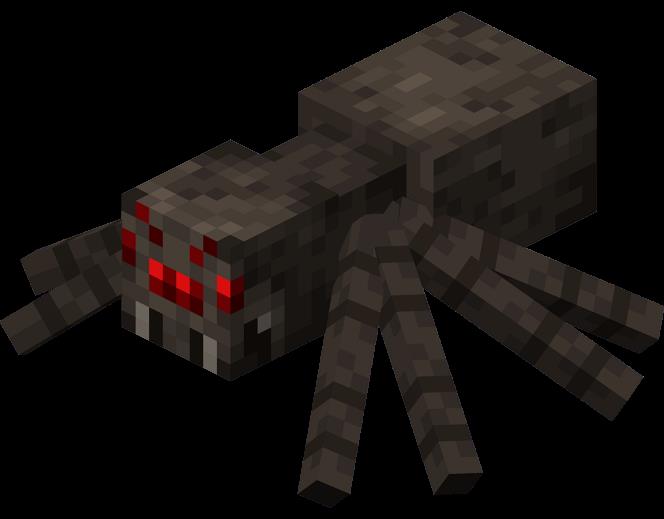
Use your torches to keep the spiders in the light.
When Spiders are killed, they will drop String, Spider Eye. The string dropped is very useful for making Bows and Fishing Rods. The string can also be turned into wool, though shearing sheep is much more effective in getting wool. The Spider Eye’s primary purpose is to make potions. The Spider will drop between 0 and 2 String when killed and 0 – 1 Spider Eyes.
Underground Mining in Minecraft Free
Mining to get different ores when you play Minecraft free is one of the most critical factors of this game, but finding specific resources can be very difficult. It will be even more difficult if you do not know the following tips to find all kinds of ores.
Different ores will be more common at different levels above bedrock. Bedrock is the lowest you can mine in the game; each block upwards counts as a different level.
First, let’s give some information on various ores:
- Diamond. Diamond is more commonly found on the 16th level and below but does not appear on the 19th and 20th levels.
- Gold. Gold will appear more commonly on the 32nd level and lower and will not appear on the 35th and 36th levels.
- Iron. Iron is commonly found on the 64th and lower levels and will not appear on the 67th and 68th levels.
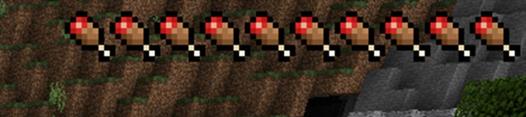
- Redstone. Redstone is commonly found on the 16th and lower levels and will not appear on the 19th and 20th levels.
- Coal. Coal is commonly found on the 128th and lower levels and will not appear on the 131st and 132nd levels.
How To Mine Efficiently
Now that you know where to find each ore more commonly, you will need to learn how to mine for them efficiently to play Minecraft well.
Rule #1 Never dig straight down.
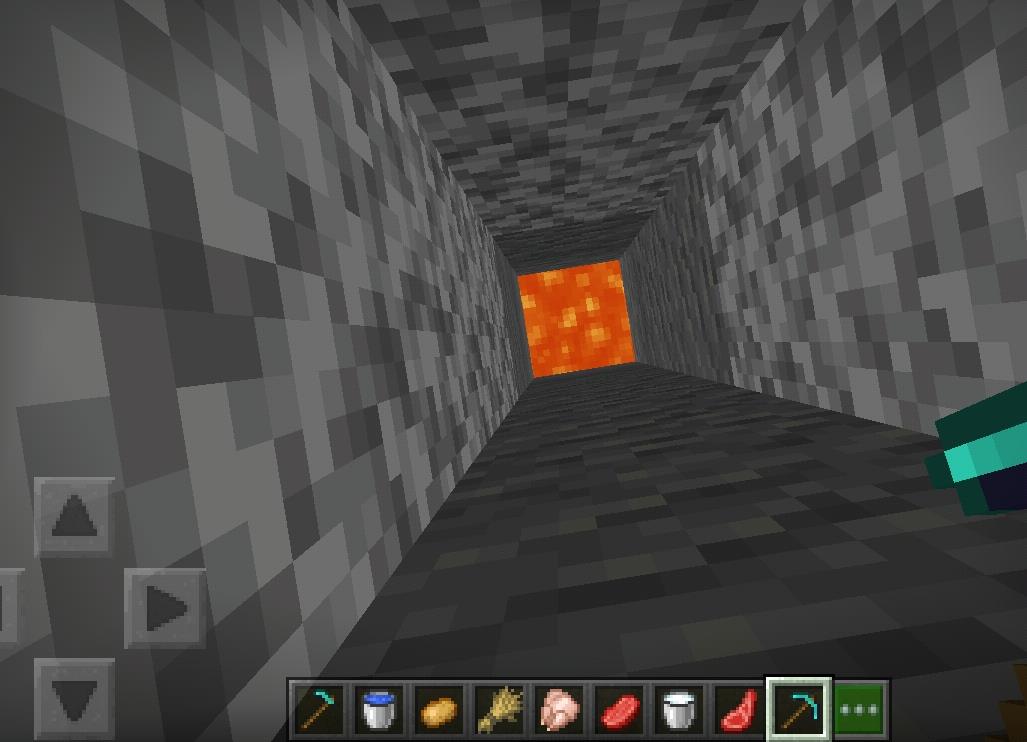
Unless you have a ton of luck and a brave heart, digging straight down can be a dangerous game. You will run the risk of falling into lava, falling down a cliff, running into a large spawn of mobs ready to kill you, or digging too deep to get back to the top.
If you decide to go through with this method, keep a bucket of water in case of lava or cliff, some armor and weapons for spawns, and a large number of ladders to climb back up. Know you are a madman if you do this, though!
Alternative mining methods depend on your style when you play Minecraft.
Method 1
You can either dig down 1 block, forward one block, or down one block repeatedly. Make sure you always have at least 2 blocks above your head as you make your way forward (making this two blocks wide will make it feel more comfortable). Turning 90 degrees when you run into a cliff or tunnel. Once you have reached bedrock, you can use the cobblestone you have gained and make stairs back to the surface.
Method 2
Make a 2 block long and 1 block wide vertical tunnel, digging downwards but always using the alternative block in front of you. While digging downward, place a ladder so that you can return to the surface. Place a torch every 5-6 levels to keep it light and monster-free. Dig until you hit bedrock, if possible.
Side Note: Don’t get distracted by certain terrains you will run into, such as natural caves or mines. Carry a water bucket to get rid of any lava in the way, and take out waterfalls, then carry on digging. The only things you should deviate your path for are end Ruins and mob spawns.
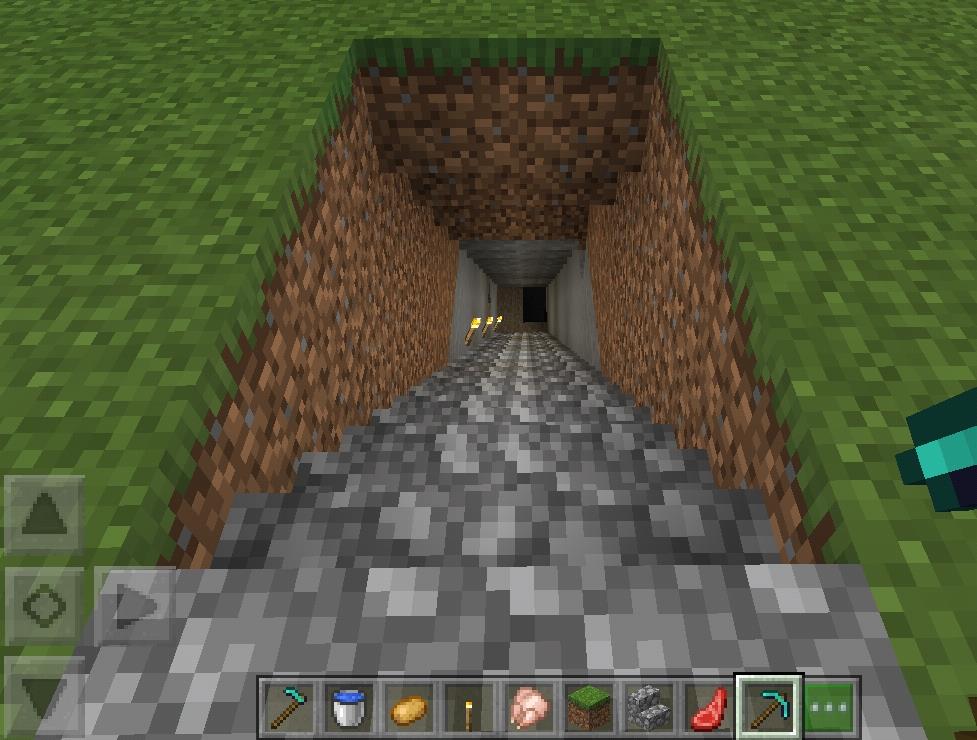
Once you have hit bedrock, go up 4 levels and dig out temporary living space. Here you can place a torch, stove, some chests, a crafting table, and a bed. From here, you can start your ore mining.
Create a tunnel that is 4 blocks high and 1 block wide, and this can be a long tunnel. Once you have gone quite far, head back to the beginning and start digging to the left or right of the wall. You will end up exposing quite a bit of the available ore, but other effective methods exist.
Fish Bone Method
First, you will need to dig until the 11th level. It is believed that the 11th layer is the richest in minerals. From here, dig the main hole 3 blocks high and 3 blocks wide. Go as far as you would like. Then you can return to the beginning and start digging into the wall every 2 blocks in your mind. You can dig 2 clocks high and 1 wide block mine with a depth of about 15 blocks. You can do this on both the left and right sides.
This method will not allow monsters to spawn because of the heights and width of the halls. You will also be less likely to run into lava. This will also ensure you are mining all the possible ore in the area.
However, this method can take up a bit of time, needs a lot of resources and torches, and is only suitable for a shorter period.
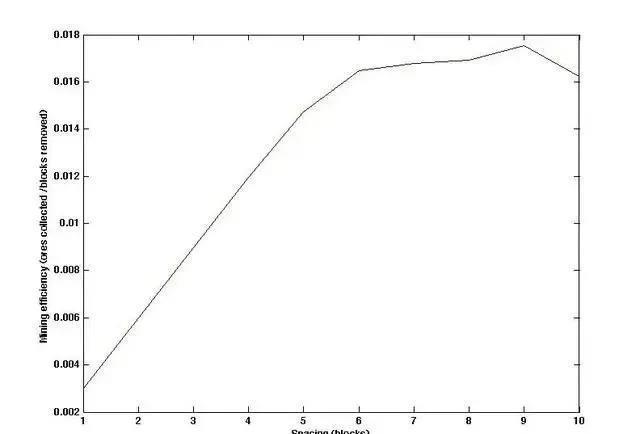
According to the Minecraft Wiki, this graph shows the “interval efficiency graph,” which shows the ratio of ore to mined blocks. The graph proves that you can expect that at 9 blocks apart, you are likely to find one of the ores. Of course, diamonds have a much lower chance of spawning over ores such as coal and iron. It can be noted that this is only the result of some computer calculations and is not definite.
Natural Mining Method
This is the most “primitive” method of mining. Using the natural caves in the game to go as deep as possible, you may want to keep a lot of torches if you choose this to prevent mob spawning and to stop yourself from getting lost when play Minecraft. Though there are other methods, I like to use 4 torches to point myself in the right direction out of the cave. It can be super confusing sometimes.
Side Note: Because natural caves are not always on the same level, you often won’t be able to get deep enough. There will also be many monsters spawning in dark areas. Bring a shield, and keep your eyes open for them!
Windmill Mining Method
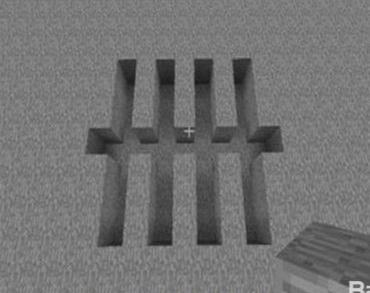
First, choose the location of your temporary mining base, then dig a 4-block wide, 4 blocks long, and 3 blocks high tunnel. From each corner of the square, dig three forward, turn right and dig 3 more. Once you have done this, your mining base will look like this windmill in the picture.
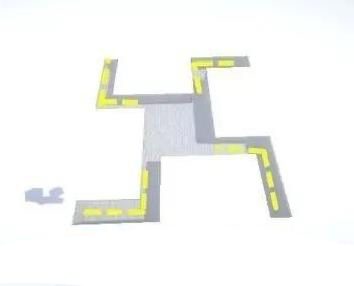
For the second step, open the 4 corners of the windmill by digging to the right of all the tunnels until you meet the other corners opening. Your original 4×4 square will not be 13×13 blocks wide. And all the blocks in this radius would have been mines out, ensuring you have missed no ores.

The next step is to repeat your mining method by going to the corners of the new hole. You will dig 3 forward and 3 right, then dig through until the tunnels meet.

Though this method may be complicated, it works better than the fishbone method in one way. Because you are unusually close to the center of the mine, this makes it easy to get back to your base to store your new minerals or get other resources. The Fishbone method can take you very far away from your tunnel base. However, not many players use this method when play Minecraft because it is slightly more complicated than other methods.
Minecraft Farm
A big part of Minecraft free is growing your crops and livestock. Mastering Minecraft farm can help you in many ways in the game. And so, how should your farm be made effectively when you play Minecraft?
The best crop design is thought to be the 9×9 broad farms. You just need to put some water in the middle, and the rest will become wet-soiled land (once you have hoed up the dirt).
If you plant your crops next to the same crop but one block apart, your crop will have a higher growth period. This can be up to half the time it would usually take for crops to grow. This does come at the expense of the planting area.
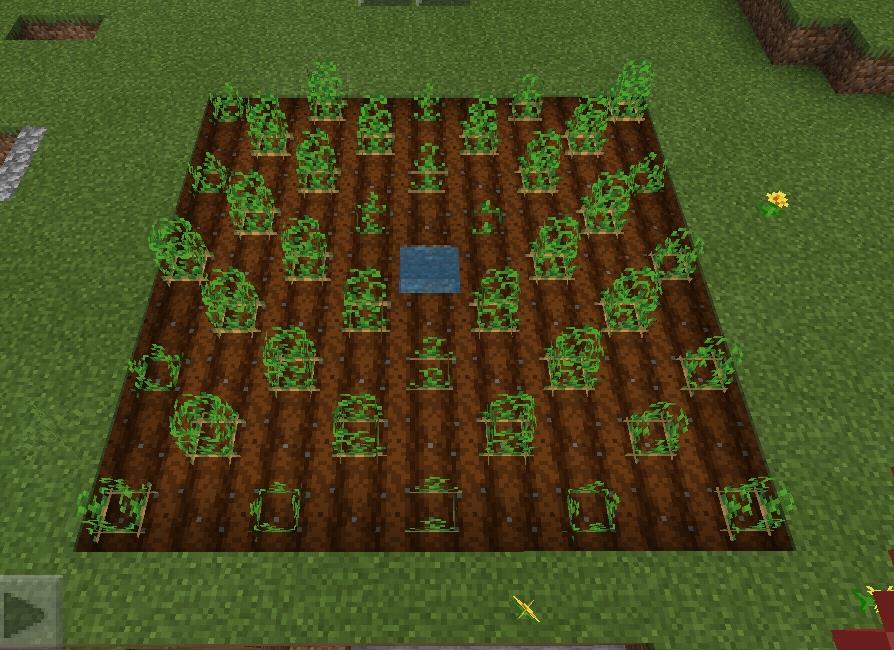
Though you use more space, you’re still getting a higher efficiency from your crop fields. This method can plant 9×5-1 per field, so 44 crops will appear. which is more than planting them next to each other and filling up the field (9×9-1)/2, which is only 40 crops in comparison… Just trust the math!
Note: Diagonal proximity does not halve the growth rate.

If you are lucky enough to get multiple seeds, such as potatoes and carrots, you can plant various crops in your field. This can give you an increased growth rate at the same time. This image demonstrates that you can achieve the highest growth rate for 2 separate crops. This will improve efficiency and save space, killing two birds with one stone!
How to Get Minecraft Download for Free?
Minecraft is available on the App Store for $6.99 and on Google Play for $7.49. But this article will show you how to play Minecraft for free on iPhone and Android. You don’t need to try Minecraft free trial.
At this point, we must mention Panda Helper. It provides Minecraft for free download on iPhones, iPad, and Android without Minecraft free trial. Just download it. So you can use Panda Helper to play Minecraft free.
Panda Helper is a third-party app store providing the most popular iOS and Android hacked apps & games, including fantastic Game Tools for every need.
How to Get Minecraft for Free on iPhone?
Before you get Minecraft free download iOS version, you must install Panda Helper on iPhone/iPad. Panda Helper iOS versions include the Free, VIP, and jailbroken versions.

The difference between the Panda Helper VIP version and the free version:
- No ads in the VIP version, Ads in the Free version(but built-in app ads NOT be removed because app developers add it. we can’t delete them, such as Instagram rocket)
- Some apps are only available on Panda Helper VIP. You can get the VIP apps list on the particular topic: “Exclusive to VIP.”
- The Features of App Cloner, Cheat Engine, Cloud Save, and Save Data are only available for Panda Helper VIP members.
- Panda Helper can be installed free when a common certificate is available. But common certificates are easily revoked by Apple. If Apple revokes the common certificate, you must buy a VIP with the super certificate before downloading Panda Helper.
Choose the version you want and follow this detailed tutorial to download Panda Helper to iOS: How to Download Panda Helper on iOS (iPhone|iPad)?

After that, Launch Panda Helper and enter “Minecraft” in the search bar. Get all results indexed by Panda Helper.
Tap Minecraft, read its description, and press “Download” to start downloading. A pop-up will appear after downloading to tell you to install the app.
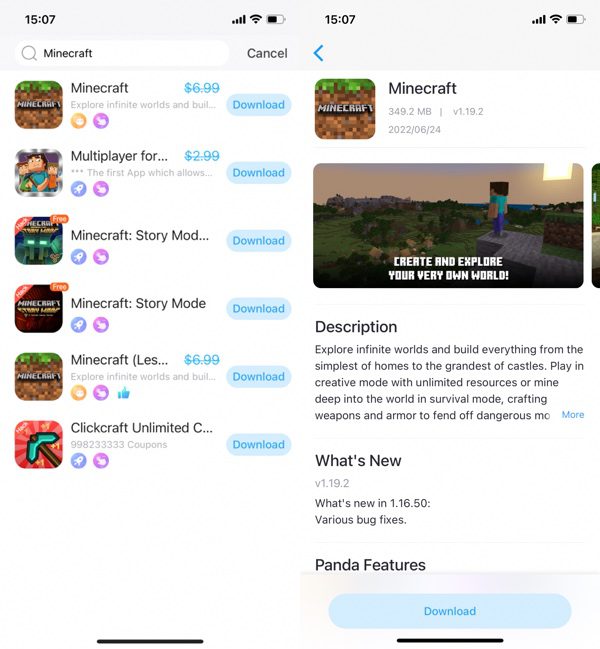
Now, enjoy yourself to play Minecraft free on your iPhone.
Besides Minecraft, you can download many apps from Panda Helper. Hacked or tweaked apps provide unlimited HP, coins or diamonds, in-app purchase free, or more features. What’s more, you have access to download paid apps on Panda Helper without payment, just like Minecraft free.
How to Get Minecraft Android for Free?
The Minecraft free trial is available on Android, but you must pay for it after the trial. If you use Panda Helper, you will not have this trouble. Before you get Minecraft APK for free, you must install Panda Helper on your Android phone.
Follow this detailed tutorial to download Panda Helper to Android: How to Download Panda Helper APK on Android?

After that, Launch Panda Helper and enter “Minecraft” in the search bar. Tap Minecraft free among all results, and press “Get” to start downloading. Once the download is complete, click Install.
Now, enjoy enjoy yourself to play Minecraft APK for free on.
How to Free Download Minecraft APK Mod?
Besides Minecraft APK original version, Panda Helper also provides free Minecraft Mod. How to play Minecraft APK mod free? The download method and the previous article, “How to Get Minecraft Android,” are consistent. Here, we explain in detail what is Minecraft PE Mods.
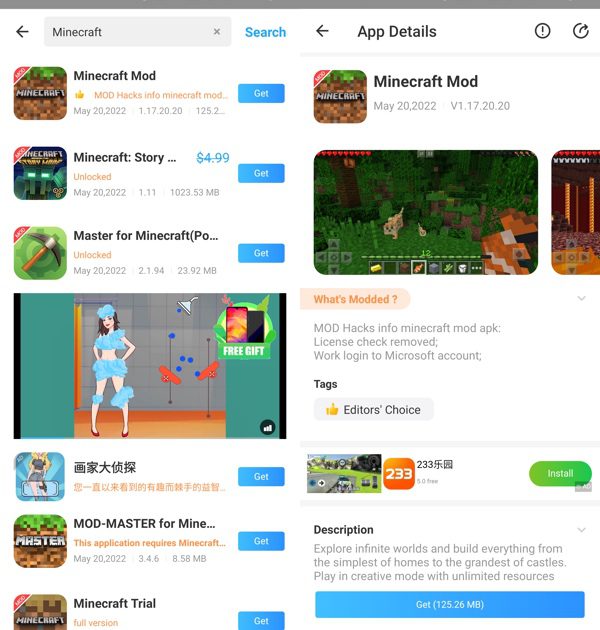
Minecraft PE Mods
Minecraft PE stands for Minecraft Pocket Edition, the aforementioned mobile version for iOS and Android phones. Mods is an abbreviation for Modifications, also known as modules, which are any modifications or additions to the original Minecraft game content. So the Minecraft APK Mod provided by Panda Helper is a Minecraft Mod for Android phones.
It has the following mod features:
- License check removed;
- Work login to Microsoft account;
- A working character editor with unlocking all features ( skins are not saved after exiting the game );


This website was… how do I say it? Relevant!!
Finally I’ve found something which helped me. Thanks a lot!
I’m not that much of a internet reader to be honest but your sites
really nice, keep it up! I’ll go ahead and bookmark your website to come back later on. Cheers